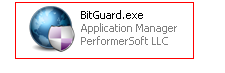
So I was back at my Desktop PC after some time and it seemed to be quite slow. I used ProcessExplorerNT and found a process called "BitGuard.exe" using fairly lot of system resources. It looked ok, although I don't recollect ever installing such a software. What caught my attention was that it was running from "\All Users\APplication Data\BitGuard". That is an unusual location for an application to get installed and so I quickly ran a scan with Avast Free Edition, but didn't detect any viruses.
I wasn't convinced, so I ran a boot time scan of my PC with Avast. And surely enough, it was able to report BitGuard.exe as a virus. One dll called protector.dll was also flagged as a virus. This is dangerous as a DLL file can be injected into any running application and modify the behavior of normal applications as well.
Avast classifies this as "Win32:BProtect-A[PUP]".
"It is not a Windows system file. The program is not visible. The file is digitally signed. BProtect.exe is able to monitor applications, record inputs and manipulate other programs. " is what file.net has to say about this file. So the behavior of this program is highly suspected.
How to remove it.
If you are using Avast, enable PUP mode before initiating scan or schedule a Boot time scan and remove the virus files.To see where to turn PUP on, see the image below.
Recomendation
Windows might keep versions of this virus in System Restore, so scheduling a boot time scan is recommended.
Showing posts with label Removing Worm. Show all posts
Saturday, October 12, 2013
Tuesday, June 3, 2008
Removing LeChuk Worm or WORM_VB.FKO
Solution
(Note: Close all instances of Internet Explorer before proceeding with the following solution.)
Terminating the Malware Program
This procedure terminates the running malware process.
Open Windows Task Manager.
• On Windows 98 and ME, press CTRL+ALT+DELETE
• On Windows NT, 2000, XP, and Server 2003, press CTRL+SHIFT+ESC, then click
the Processes tab.
In the list of running programs*, locate the process:
LeChucK.exe
wins.exe
Select the malware process, then press either the End Task or the End Process button, depending on the version of Windows on your computer.
To check if the malware process has been terminated, close Task Manager, and then open it again.
Close Task Manager.
*NOTE: On computers running Windows 98 and ME, Windows Task Manager may not show certain processes. You can use a third party process viewer such as Process Explorer to terminate the malware process.
On computers running all Windows platforms, if the process you are looking for is not in the list displayed by Task Manager or Process Explorer, continue with the next solution procedure, noting additional instructions. If the malware process is in the list displayed by either Task Manager or Process Explorer, but you are unable to terminate it, restart your computer in safe mode.
Sometimes, you may not be able to remove the file with a message that you do not have sufficient privilleges to complete the operation.
You will need to manually restore access to registry..
Removing Autostart Entries from the Registry
This solution deletes registry entries added by this malware. Before performing the steps below, make sure you know how to back up the registry and how to restore it if a problem occurs. Refer to this Microsoft article for more information about modifying your computer's registry.
Open Registry Editor. Click Start>Run, type REGEDIT, then press Enter.
In the left panel, double-click the following:
HKEY_CLASSES_ROOT>batfile>shell>open>command
In the right panel, locate the entry:
(Default) = "%System%\wins.exe "%1" %*"
Right-click on the value name and choose Modify. Change the value data of this entry to:
"%1" %*
In the left panel, double-click the following:
HKEY_CLASSES_ROOT>cmdfile>shell>open>command
In the right panel, locate the entry:
(Default) = "%System%\wins.exe "%1" %*"
Right-click on the value name and choose Modify. Change the value data of this entry to:
"%1" %*
In the left panel, double-click the following:
HKEY_CLASSES_ROOT>comfile>shell>open>command
In the right panel, locate the entry:
(Default) = "%System%\wins.exe "%1" %*"
Right-click on the value name and choose Modify. Change the value data of this entry to:
"%1" %*
In the left panel, double-click the following:
HKEY_CLASSES_ROOT>exefile>shell>open>command
In the right panel, locate the entry:
(Default) = "%System%\wins.exe "%1" %*"
Right-click on the value name and choose Modify. Change the value data of this entry to:
"%1" %*
In the left panel, double-click the following:
HKEY_CLASSES_ROOT>piffile>shell>open>command
In the right panel, locate the entry:
(Default) = "%System%\wins.exe "%1" %*"
Right-click on the value name and choose Modify. Change the value data of this entry to:
"%1" %*
Close Registry Editor.
Restoring AUTORUN.INF/s
Right-click Start then click Search... or Find..., depending on the version of Windows you are running.
In the Named input box, type:
AUTORUN.INF
In the Look In drop-down list, select a drive, then press Enter.
Select the file, then open using Notepad.
Check if the following lines are present in the file:
OPEN=%WINDOWS%\Spolis.exe
shell\open=Abrir
shell\open\Command=%WINDOWS%\Spolis.exe
shell\open\Default=1
shell\explore=Explorar
shell\explore\Command=%WINDOWS%\Spolis.exe
If the lines are present, delete the file.
Repeat steps 3 to 6 for AUTORUN.INF files in the remaining removable drives.
Close Search Results.
Deleting the Malware File(s)
Right-click Start then click Search... or Find..., depending on the version of Windows you are running.
In the Named input box, type:
%system%\CC.dll
In the Look In drop-down list, select the drive that contains Windows, then press Enter.
Once located, select the file then press SHIFT+DELETE.
Repeat steps 2-4 for the following file(s):
%system%\LeChucK.hta
%system%\zip32.dll
Important Windows ME/XP Cleaning Instructions
Users running Windows ME and XP must disable System Restore to allow full scanning of infected computers.
(Note: Close all instances of Internet Explorer before proceeding with the following solution.)
Terminating the Malware Program
This procedure terminates the running malware process.
Open Windows Task Manager.
• On Windows 98 and ME, press CTRL+ALT+DELETE
• On Windows NT, 2000, XP, and Server 2003, press CTRL+SHIFT+ESC, then click
the Processes tab.
In the list of running programs*, locate the process:
LeChucK.exe
wins.exe
Select the malware process, then press either the End Task or the End Process button, depending on the version of Windows on your computer.
To check if the malware process has been terminated, close Task Manager, and then open it again.
Close Task Manager.
*NOTE: On computers running Windows 98 and ME, Windows Task Manager may not show certain processes. You can use a third party process viewer such as Process Explorer to terminate the malware process.
On computers running all Windows platforms, if the process you are looking for is not in the list displayed by Task Manager or Process Explorer, continue with the next solution procedure, noting additional instructions. If the malware process is in the list displayed by either Task Manager or Process Explorer, but you are unable to terminate it, restart your computer in safe mode.
Sometimes, you may not be able to remove the file with a message that you do not have sufficient privilleges to complete the operation.
You will need to manually restore access to registry..
Removing Autostart Entries from the Registry
This solution deletes registry entries added by this malware. Before performing the steps below, make sure you know how to back up the registry and how to restore it if a problem occurs. Refer to this Microsoft article for more information about modifying your computer's registry.
Open Registry Editor. Click Start>Run, type REGEDIT, then press Enter.
In the left panel, double-click the following:
HKEY_CLASSES_ROOT>batfile>shell>open>command
In the right panel, locate the entry:
(Default) = "%System%\wins.exe "%1" %*"
Right-click on the value name and choose Modify. Change the value data of this entry to:
"%1" %*
In the left panel, double-click the following:
HKEY_CLASSES_ROOT>cmdfile>shell>open>command
In the right panel, locate the entry:
(Default) = "%System%\wins.exe "%1" %*"
Right-click on the value name and choose Modify. Change the value data of this entry to:
"%1" %*
In the left panel, double-click the following:
HKEY_CLASSES_ROOT>comfile>shell>open>command
In the right panel, locate the entry:
(Default) = "%System%\wins.exe "%1" %*"
Right-click on the value name and choose Modify. Change the value data of this entry to:
"%1" %*
In the left panel, double-click the following:
HKEY_CLASSES_ROOT>exefile>shell>open>command
In the right panel, locate the entry:
(Default) = "%System%\wins.exe "%1" %*"
Right-click on the value name and choose Modify. Change the value data of this entry to:
"%1" %*
In the left panel, double-click the following:
HKEY_CLASSES_ROOT>piffile>shell>open>command
In the right panel, locate the entry:
(Default) = "%System%\wins.exe "%1" %*"
Right-click on the value name and choose Modify. Change the value data of this entry to:
"%1" %*
Close Registry Editor.
Restoring AUTORUN.INF/s
Right-click Start then click Search... or Find..., depending on the version of Windows you are running.
In the Named input box, type:
AUTORUN.INF
In the Look In drop-down list, select a drive, then press Enter.
Select the file, then open using Notepad.
Check if the following lines are present in the file:
OPEN=%WINDOWS%\Spolis.exe
shell\open=Abrir
shell\open\Command=%WINDOWS%\Spolis.exe
shell\open\Default=1
shell\explore=Explorar
shell\explore\Command=%WINDOWS%\Spolis.exe
If the lines are present, delete the file.
Repeat steps 3 to 6 for AUTORUN.INF files in the remaining removable drives.
Close Search Results.
Deleting the Malware File(s)
Right-click Start then click Search... or Find..., depending on the version of Windows you are running.
In the Named input box, type:
%system%\CC.dll
In the Look In drop-down list, select the drive that contains Windows, then press Enter.
Once located, select the file then press SHIFT+DELETE.
Repeat steps 2-4 for the following file(s):
%system%\LeChucK.hta
%system%\zip32.dll
Important Windows ME/XP Cleaning Instructions
Users running Windows ME and XP must disable System Restore to allow full scanning of infected computers.
Labels:
LeChuck,
Manual Editing,
Removing Worm,
Threat
Subscribe to:
Posts (Atom)
